![]()
Using VPN with On-Demand Tokens (TOD) to Connect
to the
IP Network
![]()
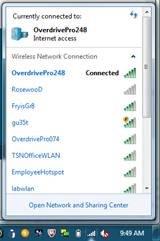
1) Connect to the Internet, wireless or hard-wired, as you normally do (This will not work while at an
IP facility).

2) Once you are connected, then click on the Cisco Anyconnect Secure Mobility Client from either your
desktop icon

Or from the Start menu:
· Click the Start button
· All Programs
· Cisco
· Cisco AnyConnect Security Mobility Client

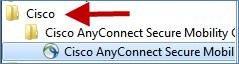
· The AnyConnect screen displays.

3) Click
the Connect ![]() button.
The User Account Control screen
displays.
button.
The User Account Control screen
displays.
Note: Not all users will see the below screen – Skip to step 7

4) In the first blank field, enter your NAIPAPER user ID.
5) TAB down and enter your NAIPAPER password.
6) Click
the Yes ![]() button.
button.
7) The following screen will appear for you to enter your PIN.

8) Enter your NAIPAPER user id in the Username field.
9) In the Passcode field, enter your PIN (or initial PIN if new user).
(a) First time users will need to create a new PIN. If you have already created a PIN please click
OK and skip to step 10.
Click OK ![]() .
For new users a new PIN window displays.
.
For new users a new PIN window displays.

Once the above screen displays, enter a new PIN in the New PIN field.
(b) Enter the same PIN number in the Verify PIN field.
(c) Click Continue ![]() The passcode will
be sent and the Passcode screen
will display.
The passcode will
be sent and the Passcode screen
will display.
10) Check your designated delivery preference (Company e-mail, Personal email or Text Message)
and within 2 minutes, your code should be delivered. If for some reason you do not receive a token
code within 2 minutes, retry the request.

11) Enter the 8-digit token code delivered to your designated preference.
12) Click
the Continue ![]() button.
The screen closes.
button.
The screen closes.
13) Wait while your PC connects. This screen displays while VPN is trying to connect.

Once this is complete, a security pop-up displays.

14) Click OK ![]() .
The same screen displays again.
.
The same screen displays again.

15) Click OK ![]() again.
You should now be connected to the NAIPAPER network
again.
You should now be connected to the NAIPAPER network
and be able to access your e-mail and other network applications.